
It has been a while that I wanted to leverage the power of ESP-8266 NodeMCU to monitor my aquarium. My first experiment is to read the water temperature every x interval and upload it to ThingSpeak.
For this experiment, I need:
- ESP-8266 NodeMCU;
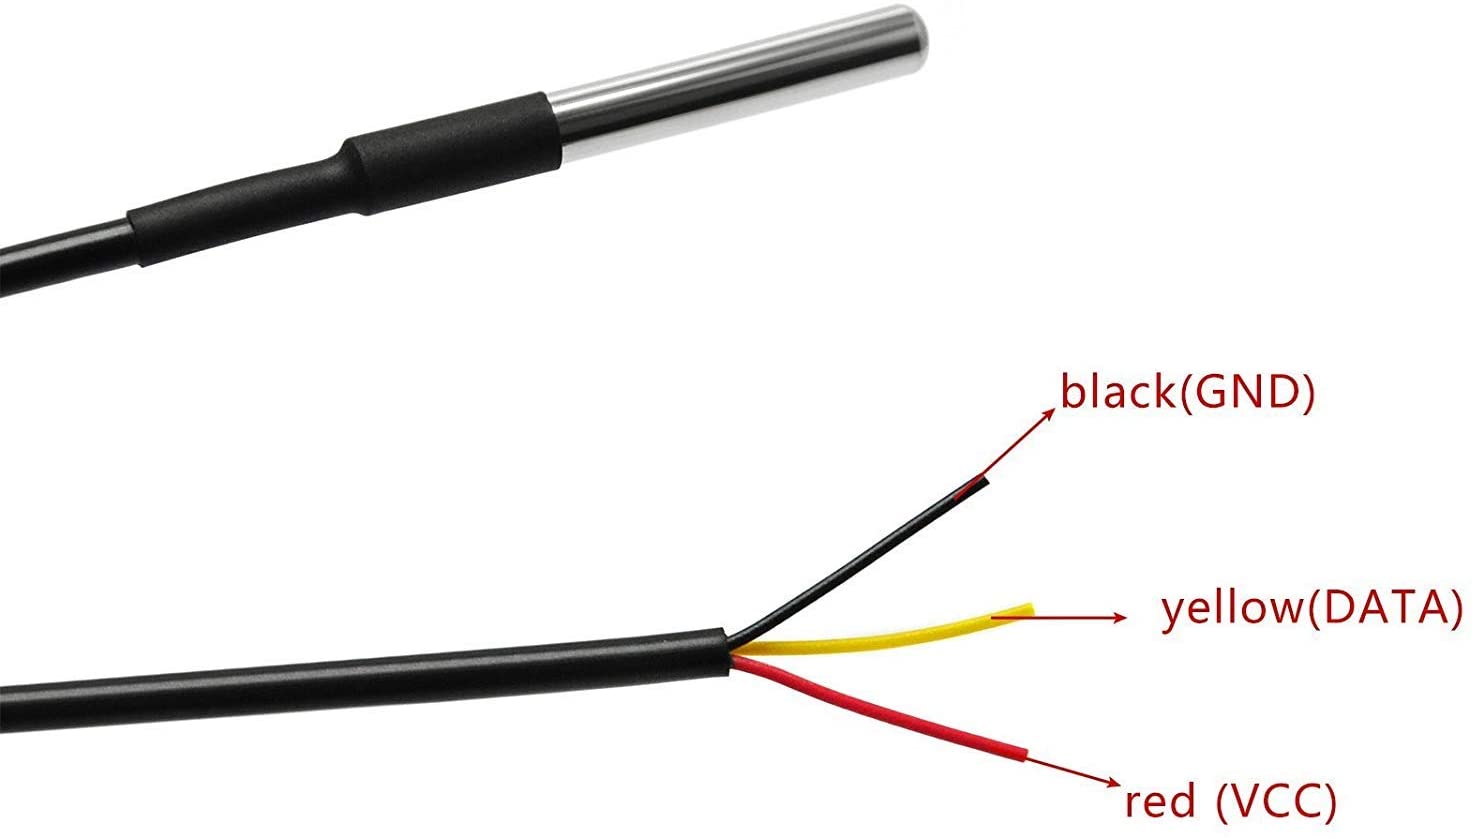
- DS18B20 waterproof sensors, which I bought from Amazon;
- 4.7kΩ resistor.
The setup is simple. I used Digital I/O pin 2 for my sensor bus. DS18B20 sensors can be connected in parallel and our microcontroller will take care to address each individual sensor to read its temperature measurement. This is all handled by Dallas Temperature and 1-Wire third-party libraries. The figure below shows my setup.
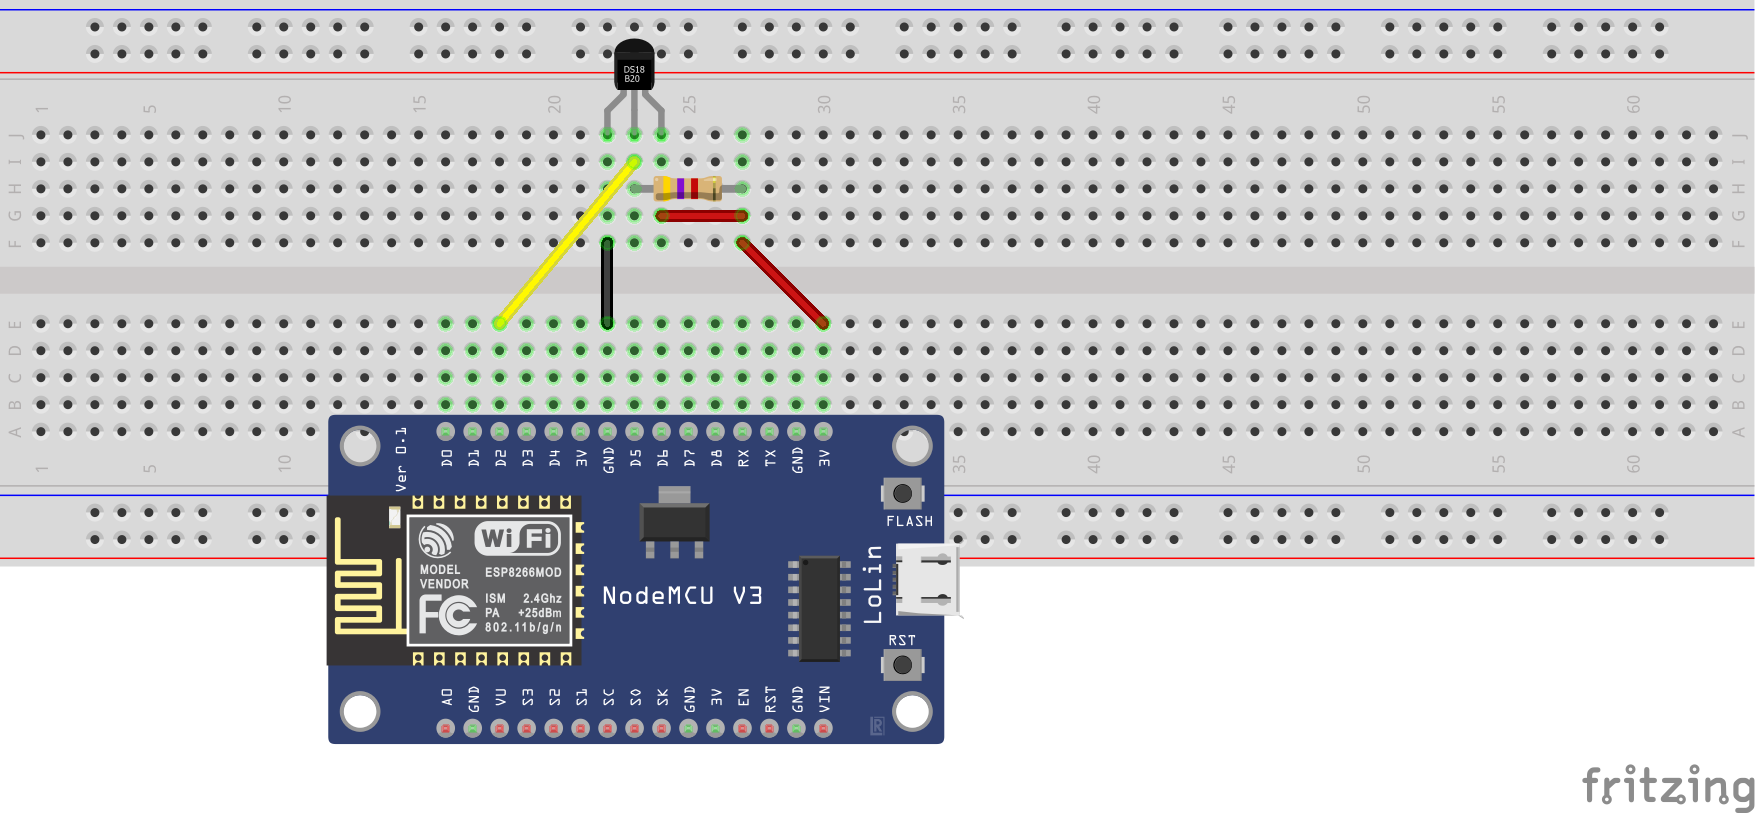
Caution: The ESP-8266 chip operates at 3.3V. Connecting it to a 5V supply will damage it. A 5V supply can be used via the micro-USB or Vin pin on the board. Similarly, the output voltage from the board are 0V for LOW and 3V to represent the HIGH logic value.
In my circuit above, Circuit 1, I used the transistor type of DS18B20. In my actual setup, I used the waterproof sensors depicted in the photo below.
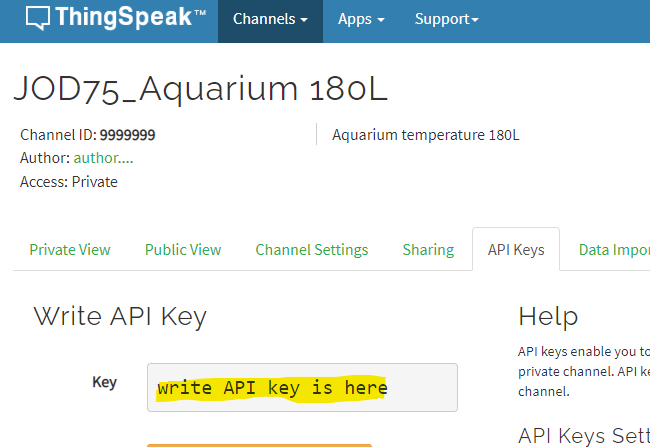
Once I had all the components in place, next I created a channel in ThingSpeak. Follow the instructions here to create your channel. With the channel created, you need the following two pieces of information: (1) the channel ID, which you can get from the channel page (see screen shot 1), and (2) the Write API key (see screen shot 2).
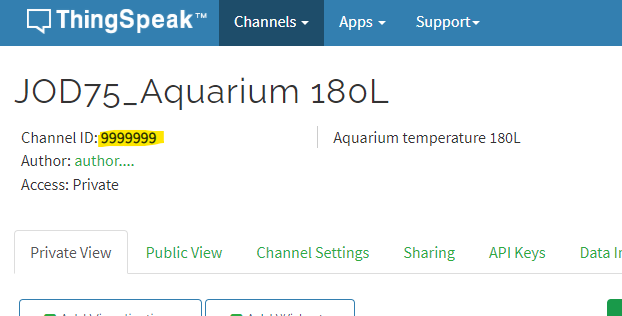
Channel ID – Screen Shot 1
Write API Key – Screen Shot 2
To communicate with ThingSpeak, I used the ThingSpeak Arduino library by MathWorks. This facilitates the calls to upload data to my channel. An alternative is to manually craft the http PUT url, but this is more prone errors. I based my code on Miles Burton’s Tester example. Here is my code, which can be downloaded from gitub.
/** The aim of this program is to read temperature data from DS18B20 sensors and* upload this data to https://www.thingspeak.com/ by using ESP8266 microcontroller.** For information about DS18B20 refer to https://datasheets.maximintegrated.com/en/ds/DS18B20.pdf** In order to upload data to ThingSpeak, you need to create a free account in the said service. Once* you create an account, you need to create a channel and obtain a Write API key and Channel ID.** The code below builds on the Tester.ino example by Dallas Temperature sensor library:* https://github.com/milesburton/Arduino-Temperature-Control-Library** Libraries needed to compile this code are* DallasTemperature.h - Dallas Temperature sensor library by Miles Burton* OneWire.h - Library for Dallas/Maxim 1-Wire Chips* ESP8266Wifi.h - Built in to ESP8266/Arduino integration.* ThingSpeak.h - Offical ThinkSpeak library by Mathworks:* https://github.com/mathworks/thingspeak-arduino**/#include <DallasTemperature.h>#include <OneWire.h>#include <ThingSpeak.h>#include <ESP8266WiFi.h>/**************************** DS18B20 Settings**************************/#define ONE_WIRE_BUS D2 // Digital I/O pin to which the DS18B20 is connected to. This will act as our data bus.#define TEMPERATURE_PRECISION 11 // Set sensor precision to 11-bits. Check the manufacturer's specifications for supported values./**************************** WIFI Settings**************************/const char *ssid = "YOUR WIFI NETWORK SSID"; // SSID of wireless network
const char *password = "YOUR WIFI PASSWORD"; // Password for wireless network
/**************************** ThingSpeak Settings**************************/unsigned long channelNumber = 9999999; // Thingspeak channel ID
const char *writeAPIKey = "WRITE API KEY"; // Write API key
int fieldStart = 1; // The field number to where we shall start the data upload to the channel
int uploadIntervalSeconds = 60; // Data reading interval
/**************************** Serial Monitor Settings**************************/const int baudrate = 115200;
int status = WL_IDLE_STATUS;
WiFiClient wifiClient;OneWire oneWire(ONE_WIRE_BUS);
DallasTemperature sensors(&oneWire);
int numberOfDevices; // Number of temperature devices found
DeviceAddress tempDeviceAddress; // We'll use this variable to store a found device address
void setup()
{Serial.begin(baudrate);
delay(10);
Serial.println();
Serial.println();
Serial.print("Connecting to WiFi with ssid: " + String(ssid));
WiFi.begin(ssid, password);
while (WiFi.status() != WL_CONNECTED)
{delay(500);
Serial.print(".");
}Serial.println("");
Serial.println("WiFi connected");
Serial.print("IP address: " + WiFi.localIP());
ThingSpeak.begin(wifiClient);
sensors.begin();
// Get a count of devices on the busSerial.println("Locating devices...");
numberOfDevices = sensors.getDeviceCount();
Serial.print("Found " + String(numberOfDevices, DEC) + " devices.");
// Report parasite power requirementsSerial.print("Parasite power is: ");
if (sensors.isParasitePowerMode())
Serial.println("ON");
elseSerial.println("OFF");
// Loop through each device, print out addressfor (int i = 0; i < numberOfDevices; i++)
{// Search the wire for addressif (sensors.getAddress(tempDeviceAddress, i))
{Serial.print("Found device at " + String(i, DEC) + " with address: ");
printAddress(tempDeviceAddress);
Serial.println();
Serial.println("Setting resolution to " + String(TEMPERATURE_PRECISION, DEC));
// Set the resolution to TEMPERATURE_PRECISION bit (Each Dallas/Maxim device is capable of several different resolutions)sensors.setResolution(tempDeviceAddress, TEMPERATURE_PRECISION);
Serial.print("Resolution actually set to: ");
Serial.print(sensors.getResolution(tempDeviceAddress), DEC);
Serial.println();
}else{Serial.println("Found ghost device at " + String(i, DEC) + " but could not detect address. Check power and cabling");
}}}// Function to print a device addressvoid printAddress(DeviceAddress deviceAddress)
{for (uint8_t i = 0; i < 8; i++)
{if (deviceAddress[i] < 16)
Serial.print("0");
Serial.print(deviceAddress[i], HEX);
}}void loop()
{Serial.println("Requesting temperatures...");
sensors.requestTemperatures();
Serial.println("Done");
// Iterate through each sensor and send readings to ThinkSpeakfor (int i = 0; i < numberOfDevices; i++)
{// Search the wire for addressif (sensors.getAddress(tempDeviceAddress, i))
{// Change this line to use getTempFByIndex if you need to read your temperateure in Fahrenheitfloat temp = sensors.getTempCByIndex(i);
ThingSpeak.setField(i + fieldStart, temp);
Serial.println("Sensor #" + String(i, DEC));
Serial.println("Temperature: " + String(temp) + "°C");
}else{Serial.println("Found ghost device at " + String(i, DEC) + " but could not detect address. Check power and cabling");
}}Serial.println("Uploading data to thingspeak ");
ThingSpeak.writeFields(channelNumber, writeAPIKey);
delay(uploadIntervalSeconds * 1000);
}
The code has a lot of comments to make it easier to understand. It is split into three main sections. The first section defines the libraries we need and the parameters to use to initialize our objects. Make sure that you change these values as instructed below before you upload the code to your module. The next section is the setup() method. Here we instantiate our objects. First we connect to our WiFi, and then discover the sensors connected to our bus. Our bus is configured to the digital i/o pin 2 in line 30. I am also using an 11-bit temperature precision, set in line 31. Note that the more precise your measurement is, the more time is required to compute it; refer to the DS18B20 datasheet here. Lastly, the loop() method. Every uploadIntervalSeconds we get the data from our sensors and upload them to ThingSpeak. For experimental purposes, you can comment out line 158 to do not upload your data. You can also troubleshoot and see what is going on through the Serial Monitor. If you want your temperature measurements in Fahrenheit, change the method call in line 146 to read getTempFByIndex() instead of getTempCByIndex().
Before you upload your code to the NodeMCU module, make sure that you change the following:
- Your WiFi SSID and password in lines 36 and 37;
- Lines 42 and 43 must reflect your ThingSpeak channel ID and Write API Key;
- Change the value in seconds in line 45 if you want more coarse sampling rate. Currently it is set to 1 minute (60 seconds).
- You may also change the value in line 44 if you already have channel fields defined and the values you are going to submit must be after these. Leave it set to 1 if the values you are going to upload are the only ones in your channel.
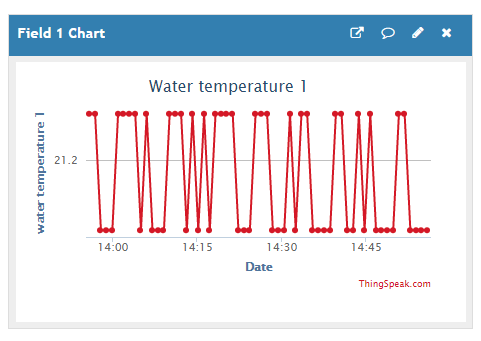
Here is a screenshot of my aquarium temperature readings:
My next step is to host a web server on my NodeMCU module and get real-time temperature by browsing to the server other than logging in ThingSpeak. I may also add some alarms if the water temperature goes out of a set range. But let’s leave this for another time. As Clounce always say, enjoy coding and have fun!