
One of the very reasons to work with JSON files is their ability to represent data as objects and arrays, in simple or complex combinations. When working with JSON files that represent data which was joined from different sources, there is a tendency of ending up with objects containing arrays of other objects. However, the interest is normally on a single or a small set of fields within the inner objects.
Using a simple example, throughout this article it is hoped to outline a simple mechanism within Azure Data Factory data flows of how to flatten the inner arrays and extract the field of interest. Finally, the field from within the object inside the inner array, are joined together to be represented in a comma separated list.
Example
Let us assume that that at a point in the process the following JSON file is received and needs to be processed using Azure Data Factory.
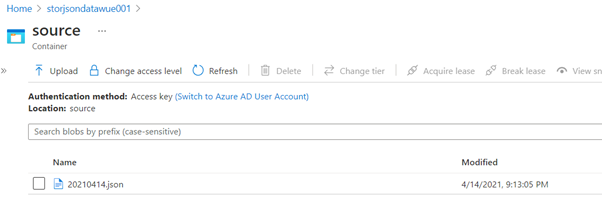
The file is in a storage account under a blob folder named ‘source’ and the name is based on the date it was retrieved. For example, 20210414.json for the file created on 14th April 2021.
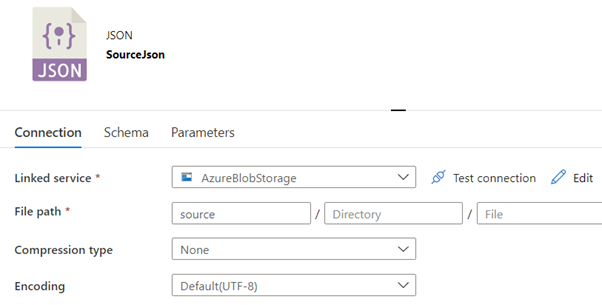
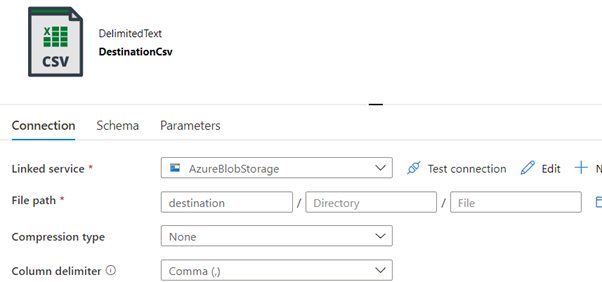
Moving back to the Azure Data Factory, a Linked Service to the storage is created and a data set for the ‘source’ container is created. Using the same Linked Service another data set for the ‘destination’ container is created. The latter will hold the CSV file that will be created to reflect the data in the JSON file.
Once the data sets are available the data flow to process the JSON source file can be created. The first step of a data flow is to set the source file.
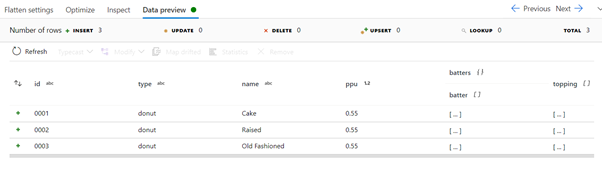
If all is set correctly the source data should appear in the Data preview, with the items column showing as an expandible collection.

To process the items collection, the collection needs to be flattened to be used similarly to a table. This is done by setting up a Flatten action, with the Unroll by field set to ‘items’. This will set the columns to the fields within the items data.
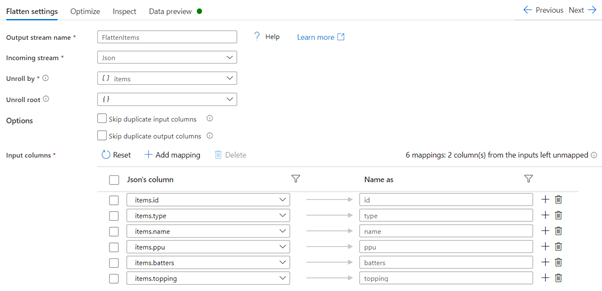
Note: A quick way to get the columns collected is to use the ‘Reset’ button after setting the ‘Unroll by’.
Again, running the data preview to check the data, the items collection can be seen as expanded except for the inner data arrays.
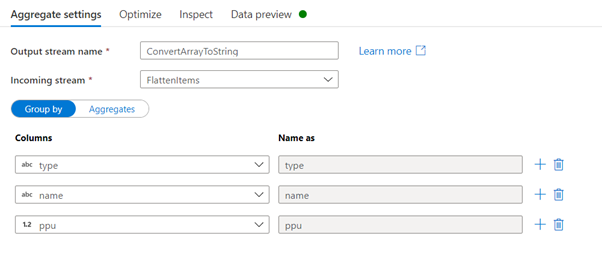
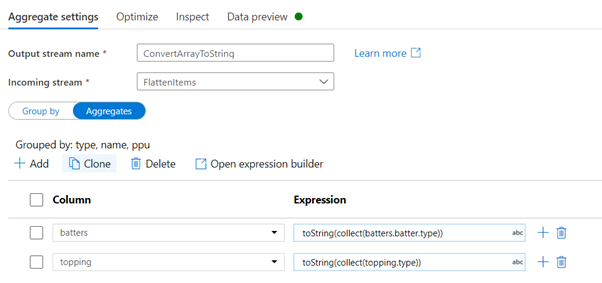
This time round instead of flattening further the data, the ‘batter’ and ‘topping’ arrays will be converted to a list of string joined together by a comma. To this conversion, the Aggregate action will be used. The first items from the Aggregate action to be configured is the group by selection. When grouping the rows, it is important to select all the fields that need to be part of the output excluding the arrays that will be aggregated. To set the aggregation, switch the view to the Aggregates section. In the Column field, select the name of the column to be aggregated. This will keep the same column name and replace it in the output. If the column name needs to change, simply type in the new column name. Next set the expression to convert the collection data into a string representation. The expression consists of 2 functions. Starting from the inner function ‘collect’, this function will create an array representing the values in the expression passed as a value. In our example, in the case of the ‘batters’ fields, the ‘collect’ function will iterate over the ‘batters.batter’ array and return an array with the value in ‘type’ field. Next the array generated by the collect() function is passed to the toString() function. The toString() function determines automatically how to stringify the parameter. Given that in this case, the parameter is a string, it will join the array value using comma separation. As of writing there is no direct support to change the separator character. If this is required, the replace(string, replace_character, new_character) function can be used.
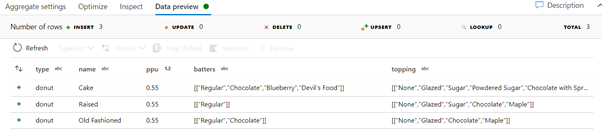
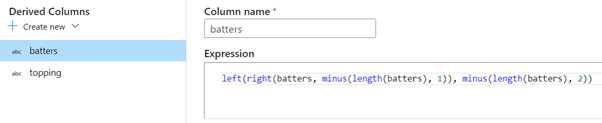
After testing the Aggregate action, one can notice a strange behaviour. The string generated on the aggregated data starts and end with 2 square brackets, instead of 1. To remove the extra square brackets around the content, the Derived Columns action can be used.
Finally, the data can be sinked into a CSV file in the destination folder by using the ‘DestinationCsv’ data set. The data flow created with the above steps will look like the image below.

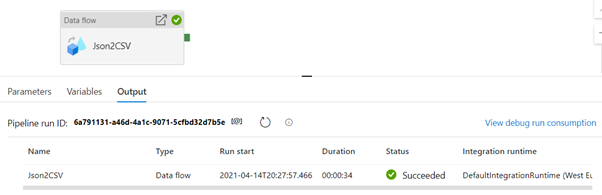
Lastly, to run the data flow an Azure Data Factory pipeline can be created that hold the data flow execution action.
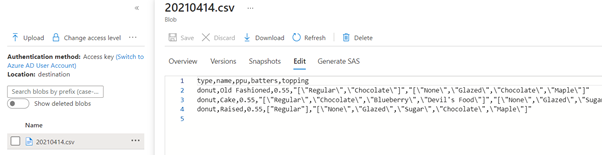
The file used, the JSON representation of the data flow and pipeline, together with the output file generated, can be downloaded from here.
Resources
- Microsoft Docs – Flatten transformation in mapping data flow
- Microsoft Docs – Data transformation expressions in mapping data flow
- Gary Strange – Flattening JSON in Azure Data Factory
- StackOverflow – How to flatten JSON data in Azure Data Factory?