Working with Dynamics 365 Customer Engagement (D365 CE), at some point or other companies end up needing to connect other system to it. There are different ways to do this connection using OData API calls, using the DataVerse Power Platform Data Flows, and other techniques. Through this article a considerably basic scenario is constructed to show how to connect with D365 CE using PowerShell for Automation.
Pre-Warnings:
- The scenario outlined below can be easily created using a Power Automate flow, without any code. However, for the purpose of this article, it is assumed that a PowerShell script is required.
- This article expects some knowledge on Dynamics 365 Customer Engagement (D365 CE); however the D365 CE part is explained for automation people who might not be very familiar with the product.
Let us take the scenario where a PowerShell script is required to query all the activities within D365 that are due to close within the current month.
The first step of the PowerShell would be to get the module installed and check that the Service Principal (Account User) details provided can connect to the D365 environment. For this purpose, the Microsoft.Xrm.Data.PowerShell module has been selected, https://github.com/seanmcne/Microsoft.Xrm.Data.PowerShell.
Set-ExecutionPolicy –ExecutionPolicy RemoteSigned –Scope CurrentUser
Install-Module Microsoft.Xrm.Data.PowerShell -AllowClobber -Scope CurrentUser
Install-Module PSWriteColor -AllowClobber -Scope CurrentUser

Connect-CrmOnline -OAuthClientId $env:clientId -ClientSecret $env:clientSecret -ServerUrl 'https://<orgname>.crm.dynamics.com'
What is important to notice is that the Client ID and Client Secrets are stored as environment variables. This is important as to make the code generic enough to be used on different environments without exposing the sensitive information. Furthermore, the Connect-CrmOnline instance takes the Client Secret in plain text, so there is no need to handle it as a Secure String. Once the connection is established, D365 can be queried for the information. The PowerShell module documentation can be used to work with single records. However, to work with multiple records, especially to fetch the data using a complex query, the module supports fetching using the Fetch XML queries.
Obtaining the Fetch XML query, requires logging into the D365 instance and using the Advanced Find functionality (Figure 1 below) the query can be constructed using the query dialog. Once the query is constructed and executed using the Results button to check it is returning the correct records, the Fetch XML can be downloaded using the indicated button in Figure 2.


This will download a file with the query that was constructed. For the query in Figure 2 the fetch XML provided is:
<fetch version="1.0" output-format="xml-platform" mapping="logical" distinct="false">
  <entity name="activitypointer">
    <attribute name="activitytypecode" />
    <attribute name="subject" />
    <attribute name="statecode" />
    <attribute name="prioritycode" />
    <attribute name="modifiedon" />
    <attribute name="activityid" />
    <attribute name="instancetypecode" />
    <attribute name="community" />
    <order attribute="modifiedon" descending="false" />
    <filter type="and">
      <condition attribute="scheduledend" operator="on-or-after" value="2021-04-01" />
    </filter>
  </entity>
</fetch>
Copy the XML within the downloaded file and pass the XML to the PowerShell Get-CrmRecordsByFetch -Fetch parameter.
At this stage, the query has a fixed date. So it needs be changed to a variable that takes the 1st of the current month and use the variable in the fetch XML.
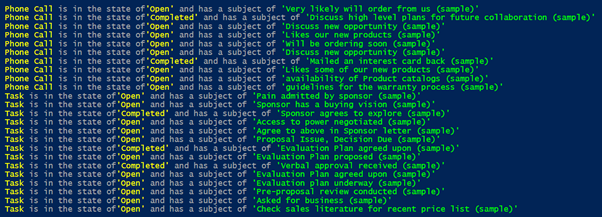
$FromDate = Get-Date -Format 'yyyy-MM-01'

$Records = Get-CrmRecordsByFetch -conn $Connection -Fetch @"
<fetch version="1.0" output-format="xml-platform" mapping="logical" distinct="false">
  <entity name="activitypointer">
    <attribute name="activitytypecode" />
    <attribute name="subject" />
    <attribute name="statecode" />
    <attribute name="prioritycode" />
    <attribute name="modifiedon" />
    <attribute name="activityid" />
    <attribute name="instancetypecode" />
    <attribute name="community" />
    <order attribute="modifiedon" descending="false" />
    <filter type="and">
      <condition attribute="scheduledend" operator="on-or-after" value="$($FromDate)" />
    </filter>
  </entity>
</fetch>
"@

$Records.CrmRecords | %{ Write-Color -T $_.activitytypecode, " is in the state of", "'$($_.statecode)'", " and has a subject of ", "'$($_.subject)'" -C Yellow, @([Console]::ForegroundColor), Yellow, @([Console]::ForegroundColor), Green }
Once the Get-CrmRecordsByFetch is executed, a set of records is returned. By iterating over the records, operations on the data can be performed based on what automation is being created. For the purpose of the article, the data is only displayed in a fancy string.