
The code used in this article can be found at https://github.com/kdemanuele/102-terraform-modules-and-multiple-instance
When working with large or reusable code, in programming languages it is common practice to organise the code in classes and libraries. Terraform provide a similar concepted named ‘modules‘. A module is a reusable terraform module that can either be shared through the modules registry provided by Terraform, https://registry.terraform.io/browse/modules, or simply a folder within your project.
For the purpose of this article the local folder approach for modules is used.
What is a module?
A module consists of a number of terraform scripts that can be packaged together and abstracted using a more significant name to the setup. A typical module setup consists of:
- A variables file, called variables.tf
- A collection of resource scripts files with the extension
.tf, for terraform scripts.
To use the package in the main.tf file of the project create a module block and set the source meta-attribute to point to the location of the module folder. If the module is expecting any parameters, variables to be set, it is important to initialise them in the module block.
Example: Let’s assume that we have a useful module that creates a logic app which returns the text ‘Hello <person name>’ when called over a POST method. The module is defined in the echo-logic-app folder of the project. The folder contains 2 files, the variables file and the logic app file. Both files are reproduced below.
# logicapp.tf
# https://github.com/kdemanuele/102-terraform-modules-and-multiple-instance/blob/main/echo-logic-app/logicapp.tf
resource "azurerm_logic_app_workflow" "logic-app-workflow" {
  name                = "logic-echo-dev-001"
  location            = var.environment.location
  resource_group_name = var.environment.resource_group_name
}

resource "azurerm_logic_app_trigger_http_request" "logic-app-trigger" {
  name         = "HTTP_Request"
  logic_app_id = azurerm_logic_app_workflow.logic-app-workflow.id
  schema       = <<SCHEMA
{
    "type": "object",
    "properties": {
        "hello": {
            "type": "string"
        }
    }
}
SCHEMA
}

resource "azurerm_logic_app_action_custom" "logic-app-response" {
  name         = "HTTP_Response"
  logic_app_id = azurerm_logic_app_workflow.logic-app-workflow.id
  body         = <<BODY
{
    "inputs": {
        "body": "Hello @{triggerBody()?['hello']}",
        "headers": {
            "Content-Type": "text/plain"
        },
        "statusCode": 200
    },
    "kind": "http",
    "runAfter": {},
    "type": "Response"
}
BODY
}
# variables.tf
# https://github.com/kdemanuele/102-terraform-modules-and-multiple-instance/blob/main/echo-logic-app/variables.tf
variable "environment" {
type = object({
resource_group_name = string
location = string
})
}Then in the project main terraform file, the module is included and referenced as echo-api. The code below demonstrates how the module is called and referenced. Also it demonstrates how variables are defined and passed to the module.
provider "azurerm" {
features {}
}
locals {
regionList = [
"westeurope",
"northeurope",
"eastus"
]
regions = {
westeurope = { code = "weeu", purpose = "sample1" },
northeurope = { code = "noeu", purpose = "sample2" },
eastus = { code = "eaus", purpose = "sample3" }
}
}
resource "azurerm_resource_group" "rg_demo_module" {
name = "rg-demo-module"
location = "West Europe"
}
module "echo-api" {
source = "./echo-logic-app"
environment = {
location = "westeurope"
resource_group_name = azurerm_resource_group.rg_demo_module.name
}
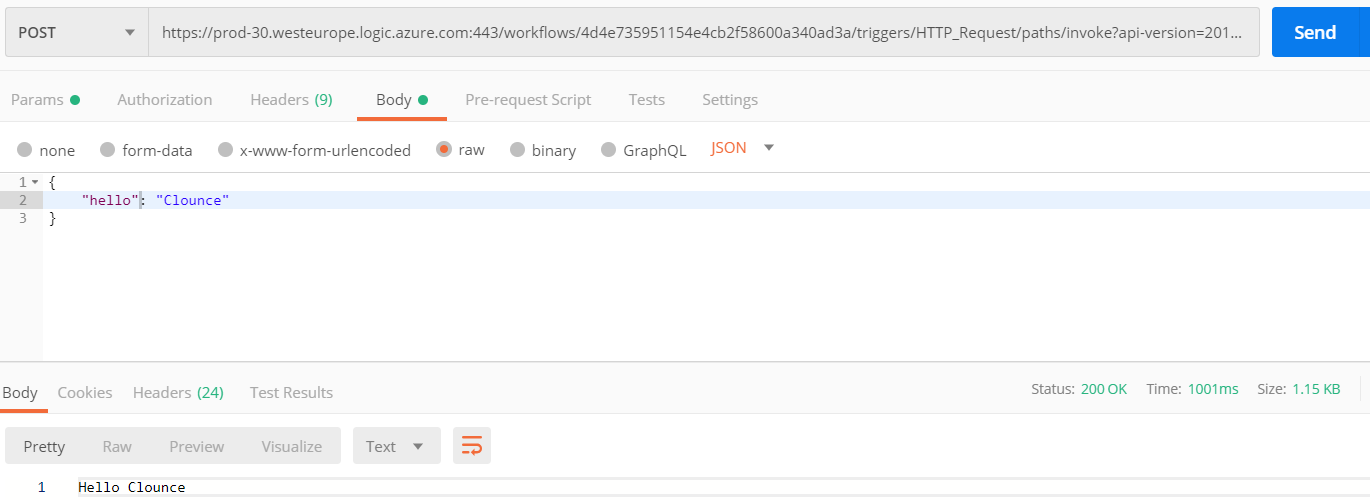
}Testing the Echo API using Postman
Note: The URL for the API is generated when the logic app is created, it can be retrieved from the portal by navigating to the Logic App designer.
Multiple instance deployment
With the latest terraform versions it is possible to deploy multiple instances of the same resource without the need to repeatedly call the module. If one is following the recommended naming convention standard by Microsoft, https://docs.microsoft.com/en-us/azure/cloud-adoption-framework/ready/azure-best-practices/resource-naming, it is possible to use the count parameter to the resources.
The count will meta-attribute will create an array of the same object with the specified number of instances. Note that a count value of 0 will not create any instances, and it is a way to disable a resource creation.
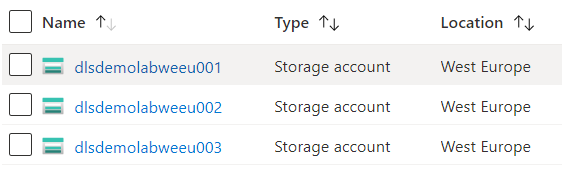
Example: deploy 3 storage accounts in the same region:
provider "azurerm" {
  features {}
}

resource "azurerm_resource_group" "demo_resource" {
  name     = "demo-resource"
  location = "West Europe"
}

resource "azurerm_storage_account" "demo_datalake" {
  count                    = 3
  name                     = "dlsdemolabweeu00${format("%03d", count.index + 1)}"
  resource_group_name      = azurerm_resource_group.demo_resource.name
  location                 = "westeurope"
  account_tier             = "Standard"
  account_replication_type = "LRS"
  account_kind             = "StorageV2"
  is_hns_enabled           = "true"
}
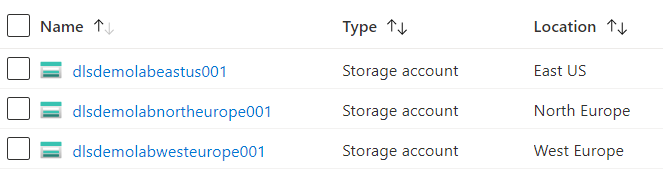
Example: deploy 3 datalake instances in different regions it is possible to do this using:
provider "azurerm" {
  features {}
}

locals {
  regions = [
    "westeurope",
    "northeurope",
    "eastus"
  ]
}

resource "azurerm_resource_group" "demo_resource" {
  name     = "demo-resource"
  location = "West Europe"
}

resource "azurerm_storage_account" "demo_datalake" {
  count                    = 3
  name                     = "dlsdemolab${local.regions[count.index]}001"
  resource_group_name      = azurerm_resource_group.demo_resource.name
  location                 = local.regions[count.index]
  account_tier             = "Standard"
  account_replication_type = "LRS"
  account_kind             = "StorageV2"
  is_hns_enabled           = "true"
}
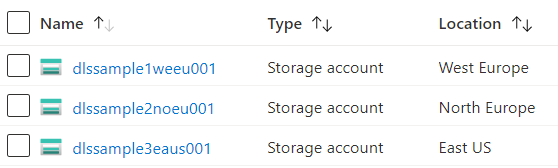
Another way to deploy multiple instances when not only the number of instances need to be managed but also some additional information, then it is possible to use the for-each meta-attribute. In the example below the purpose of the instance and the region are determined by the instance being deployed. In this case the for-each meta-attribute is more suited as can be seen in the sample code below.
locals {
  regions = {
    westeurope  = { code = "weeu", purpose = "sample1" },
    northeurope = { code = "noeu", purpose = "sample2" },
    eastus      = { code = "eaus", purpose = "sample3" }
  }
}

resource "azurerm_resource_group" "rg_demo_foreach" {
  name     = "rg-demo-foreach"
  location = "West Europe"
}

resource "azurerm_storage_account" "demo_datalake_foreach" {
  for_each                 = local.regions
  name                     = "dls${each.value.purpose}${each.value.code}001"
  resource_group_name      = azurerm_resource_group.rg_demo_foreach.name
  location                 = each.key
  account_tier             = "Standard"
  account_replication_type = "LRS"
  account_kind             = "StorageV2"
  is_hns_enabled           = "true"
}
References
- Modules https://www.terraform.io/docs/configuration/blocks/modules/index.html
- Define your naming convention https://docs.microsoft.com/en-us/azure/cloud-adoption-framework/ready/azure-best-practices/resource-naming
- Pad Integers in Terraform https://tothecloud.dev/pad-integers-in-terraform/